
18. Vendors
Vendor records, contracts and renewals, and vendor expenses.
What the Vendors module is for
A vendor is anyone the society pays for goods or services: the security agency, the lift maintenance company, the housekeeping contractor, the electrician. The Vendors module keeps three things together:
- the vendor register: who they are, their tax and bank details;
- their contract: when it starts and ends, with a warning before it runs out;
- their expenses: each payment, approved before it reaches the ledger.
Small cash purchases from the office drawer belong in Petty Cash instead.
Open Vendors arrow_forward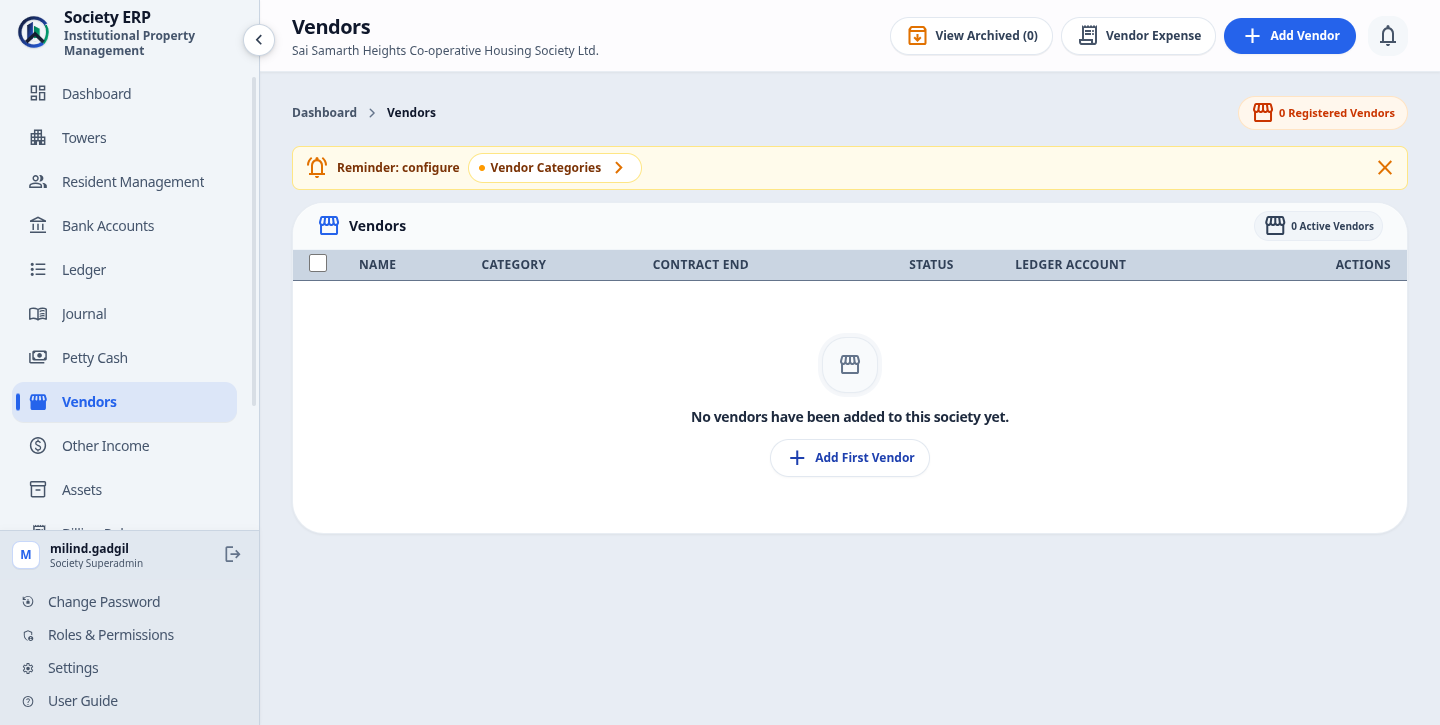
Vendor categories
Every vendor belongs to a category, such as Security, Housekeeping or Electrical. A category is only a name used to group vendors. There are no categories to begin with, and a vendor cannot be added until at least one exists.
- Open Settings and choose Vendor Categories .
- Under Add Category , type the Category Name (up to 50 characters) and click Add Category .
- A name can be used only once in the society.
- Edit renames a category. Its vendors follow the new name.
- Archive hides a category. It is refused while active vendors are assigned to it; move those vendors to another category or deactivate them first.
- View Archived lists archived categories, where Restore brings one back and Delete removes it permanently, provided no vendor uses it.
Adding a vendor
- Open Vendors and click Add Vendor .
- Fill in Vendor Information, then Bank Details and Contract & Ledger Account as far as you have them.
- Click Add Vendor .
| Name | The vendor's business name. Required. |
| Category | One of your vendor categories. Required. |
| Tax number | The vendor's GST or PAN number. Optional. |
| Status | Active or Inactive. New vendors start Active. |
| Bank account name | The account holder or bank name. |
| Bank account number | The account number. |
| Bank IFSC | Exactly 11 characters, for example HDFC0001234. |
| Contract start date | The first day of the current contract. Optional. |
| Contract end date | The last day of the current contract. Optional, but contract warnings work only when it is filled in. It cannot be before the start date. |
| Ledger account | The ledger account this vendor's expenses are posted to. Left on Not linked, expenses go to Vendor Expenses (EXP-006). |
Bank details are all or nothing
Leave the three bank fields empty, or fill in all three. If you enter only one or two, the form will not save: "To add bank details, fill in account name, account number, and IFSC code together."Click a vendor's row to open its page. It shows the current contract, the Bank & Tax details, the linked ledger account, the total of posted expenses, the contract history and the ten most recent expenses. Edit on that page, or Edit Vendor in the row's menu, changes any of the fields above.
Active, inactive and archived
| Active | In use. Expenses can be logged and contract warnings are shown. |
| Inactive | Still in the list, shown dimmed. No new expenses can be logged and no contract warnings are raised. |
| Archived | Taken off the list and made Inactive. Found under View Archived . |
- Deactivate and Activate in the row's menu switch between Active and Inactive.
- Archive Vendor archives a vendor. Restore Vendor brings it back to the list, still Inactive; use Activate to make it usable again.
- A vendor with expenses awaiting approval cannot be deactivated or archived. Approve or reject those expenses first. Posted and rejected expenses do not block.
- Tick several vendors to use the bar at the bottom: Archive Selected , Activate , Deactivate , or Restore Selected on the archived list.
- Delete permanently ( Delete Vendor ) is offered on the archived list. It cannot be undone, and it is refused for a vendor that has any expense on record, whatever its status.
Contract warnings
The system watches the Contract end date of every active vendor that has one.
| Expiring soon | The contract ends today or within the next 30 days. |
| Expired | The end date has passed. |
The label appears beside the vendor's contract end date in the list and on the vendor's page. At the top of the Vendors list, the counts expired and expiring soon link to the Contract Warnings page, which lists Expired Contracts and Expiring Soon separately with a Renew link on each row.
These warnings are shown on the Vendors screens only. They are not sent by email and do not appear under the bell in the top bar, so look at the Vendors list regularly. An expired contract does not stop expenses being logged for the vendor.
Open Contract Warnings arrow_forwardRenewing a contract
Renewing replaces the contract dates with a new period and keeps the old period on record.
- Open the vendor and click Renew Contract . For a vendor with a warning, the same action is in the row's menu on the Vendors list.
- Check the New contract start date and New contract end date. They are filled in for you: the start is the day after the current end date, and the end is a year later.
- Add a Remark if you wish, for example the new rate or the committee resolution.
- Click Renew Contract .
- The new end date must be today or later, and after the new start date.
- Renewing an Inactive vendor makes it Active again.
- An archived vendor cannot be renewed. Restore it first.
Contract History on the vendor's page lists every earlier period with who recorded it and when. The Action column shows how the period ended:
| Renewed | The period was replaced through Renew Contract. The remark you entered is shown. |
| Dates Edited | The contract dates were changed on the Edit Vendor form. The dates as they were before the change are kept. |
History rows cannot be edited or removed. Use Renew Contract for a real renewal and Edit only to correct a date typed wrongly.
Vendor ledger settings
Each vendor can be linked to the ledger account its expenses are posted to, for example Security Charges for the security agency. A vendor that is not linked posts to the general account Vendor Expenses (EXP-006), which makes the Income & Expenditure report less useful.
- Open Settings and choose Vendor Ledger Settings . Every vendor that is not archived is listed.
- Choose the Ledger Account on the vendor's row and click Save . Each row is saved on its own.
- The same choice is the Ledger account field on the vendor form. On the Vendors list, an unlinked vendor shows Link Ledger .
- Only active ledger accounts are offered. Create the account in the Ledger first if it does not exist.
- The account is read at the moment an expense is approved. Changing it later affects future approvals only; vouchers already posted stay where they are.
Logging a vendor expense
- Open the vendor and click Log Expense . Or open Vendor Expense from the Vendors list and click Add Vendor Expense .
- Fill in the fields below and click Log Expense .
| Vendor | Only Active vendors are listed. Started from a vendor's page, it is fixed to that vendor. |
| Amount | The amount paid. Must be above zero. |
| Date | The date of the bill or payment. The voucher carries this date. |
| Description | What the money was spent on. Required. |
| Invoice number | The vendor's bill number. Optional; it becomes the voucher's reference. |
| Attachment | One scan or photo of the bill: PDF, JPG or PNG. Optional. |
Every vendor expense is saved as Pending Approval, whatever the amount and whoever enters it. Nothing reaches the ledger yet.
Check before you save
A vendor expense cannot be edited after it is saved, and the attachment cannot be added later. If something is wrong, reject it and log it again.Approving or rejecting an expense
The Vendor Expenses page lists every expense for every vendor, newest first, with its status.
- Find the expense marked Pending Approval. Open View in the Attachment column to check the bill.
- Click Approve or Reject .
- Add a Remark if you wish and confirm.
| Pending Approval | Logged, not yet decided. Not in the books. |
| Posted | Approved. A Bank Payment voucher is posted: debit the vendor's ledger account, credit the Bank Accounts Ledger. The voucher number appears in the Ledger column. |
| Rejected | Turned down. It stays in the list as a record and never reaches the books. |
| Refunded | A posted expense that was undone. Its voucher is reversed. It stays in the list as a record. |
Approval and rejection are final: a posted or rejected expense cannot be edited, reopened or deleted. To undo a posted expense, use Refund (below).
Refunding a posted expense
On the Vendor Expenses page (or the vendor's own page), open the actions for a Posted expense and choose Refund . Add a remark and confirm. The Bank Payment voucher is reversed and the expense is marked Refunded. Only a Posted expense can be refunded, once. It needs the Vendors: Expense Approval permission.
Common problems
- The Category list on the vendor form is empty: add a category under Settings, Vendor Categories.
- "To add bank details, fill in account name, account number, and IFSC code together": complete all three bank fields or clear all three.
- "IFSC code must be exactly 11 characters": check the code against a cheque leaf.
- "Cannot archive vendor ... pending expense(s) awaiting approval": approve or reject the vendor's pending expenses, then try again. The same applies to Deactivate.
- A vendor is missing from the Vendor list on the expense form, or has no Log Expense button: it is Inactive or archived. Activate it.
- A vendor with a past end date shows no warning: the vendor is Inactive. Warnings are raised for Active vendors only.
- The expense was posted to Vendor Expenses instead of the vendor's own account: the vendor was not linked when the expense was approved. Link it under Vendor Ledger Settings for the future, and move the posted amount with a journal voucher.
- The Vendor Dues report shows an amount for a vendor you have already paid: that report totals expenses still Pending Approval. Approve or reject them.